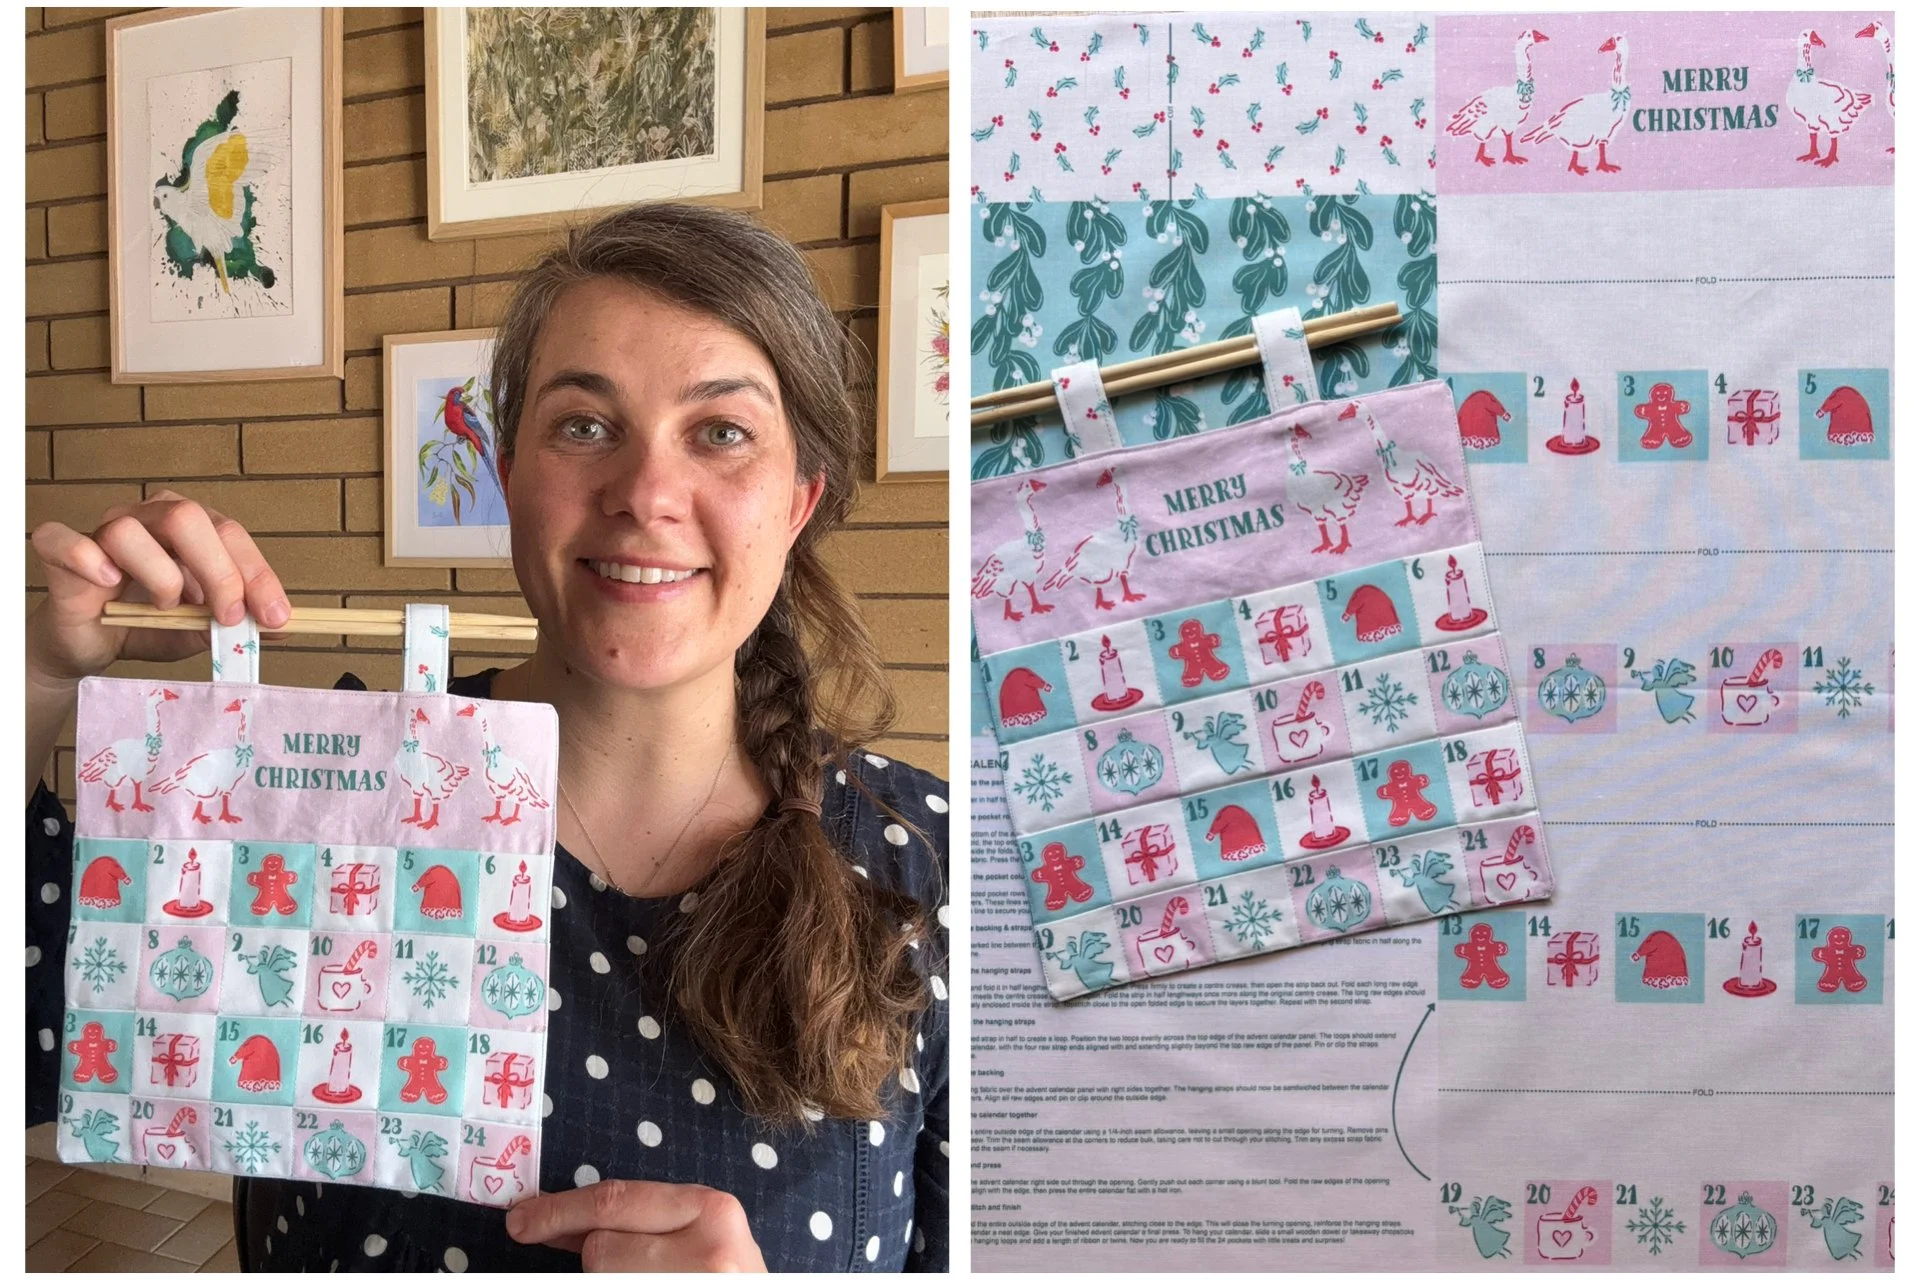
Follow the steps below to create your finished mini advent calendar using the fat quarter sewing panel
You can purchase this advent calendar sewing panel on Spoonflower. Search for design ID: 23355457. Each pocket on the finished calendar measures approximately 1.4 × 1.4 inches.
Step 1 - Separate the panel pieces
Cut the fat quarter in half to separate the advent calendar panel from the backing, hanging straps and instructions. Set the backing and strap fabric aside for now.
Step 2 - Fold the pocket rows
Starting at the bottom of the advent calendar panel, fold the fabric back and forth along the marked lines, alternating the direction of each fold to create a series of pleats. As you fold, the top edge of each numbered row should meet the bottom edge of the numbered row above it. The plain fabric between the numbered rows will be tucked inside the folds. Continue folding until all four pocket rows are formed. Your folded advent calendar panel should now be approximately the same size as the backing fabric. Press the folds firmly with a hot iron to help hold them in place.
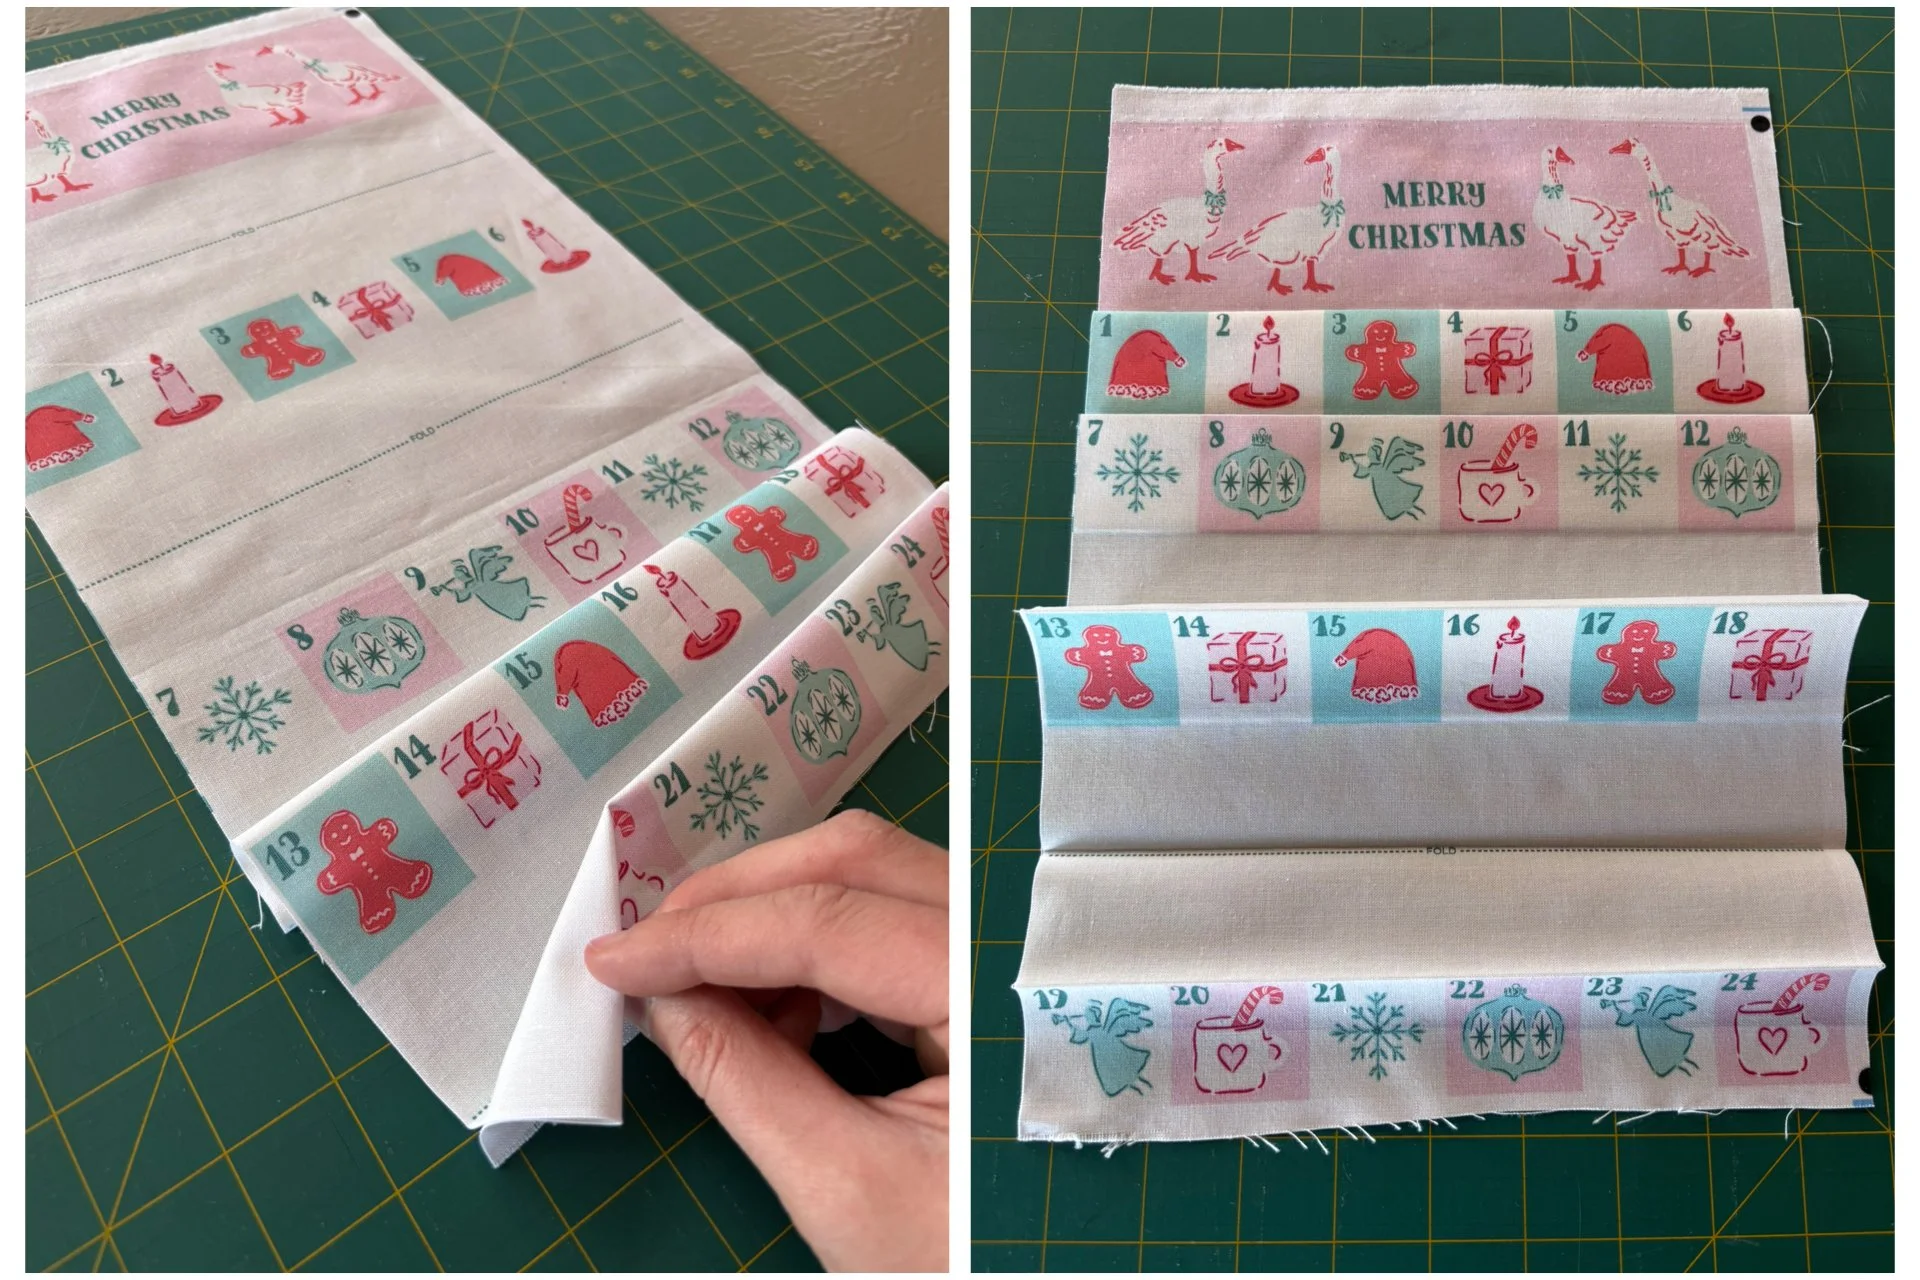
Folding the pocket rows
Step 3 - Create the pocket columns
Pin or clip the folded pocket rows securely in place. Following the marked vertical lines on the panel, sew five straight lines from top to bottom, stitching through all of the folded layers. These lines will secure the pleats and divide the four folded rows into six columns, creating 24 individual pockets. Backstitch at the beginning and end of each line to secure your stitching.
Step 4 - Cut the backing & straps
Cut along the marked line between the backing fabric (mistletoe print) and the hanging strap fabric (holly print). Next, cut the hanging strap fabric in half along the marked green line.
Step 5 - Make the hanging straps
Take one strap and fold it in half lengthways, wrong sides together. Press firmly to create a centre crease, then open the strip back out. Fold each long raw edge inward so that it meets the centre crease and press again. Fold the strip in half lengthways once more along the original centre crease. The long raw edges should now be completely enclosed inside the strap. Topstitch close to the open folded edge to secure the layers together. Repeat with the second strap.
Step 6 - Attach the hanging straps
Fold each finished strap in half to create a loop. Position the two loops evenly across the top edge of the advent calendar panel. The loops should extend down over the calendar, with the four raw strap ends aligned with and extending slightly beyond the top raw edge of the panel. Pin or clip the straps securely in place.
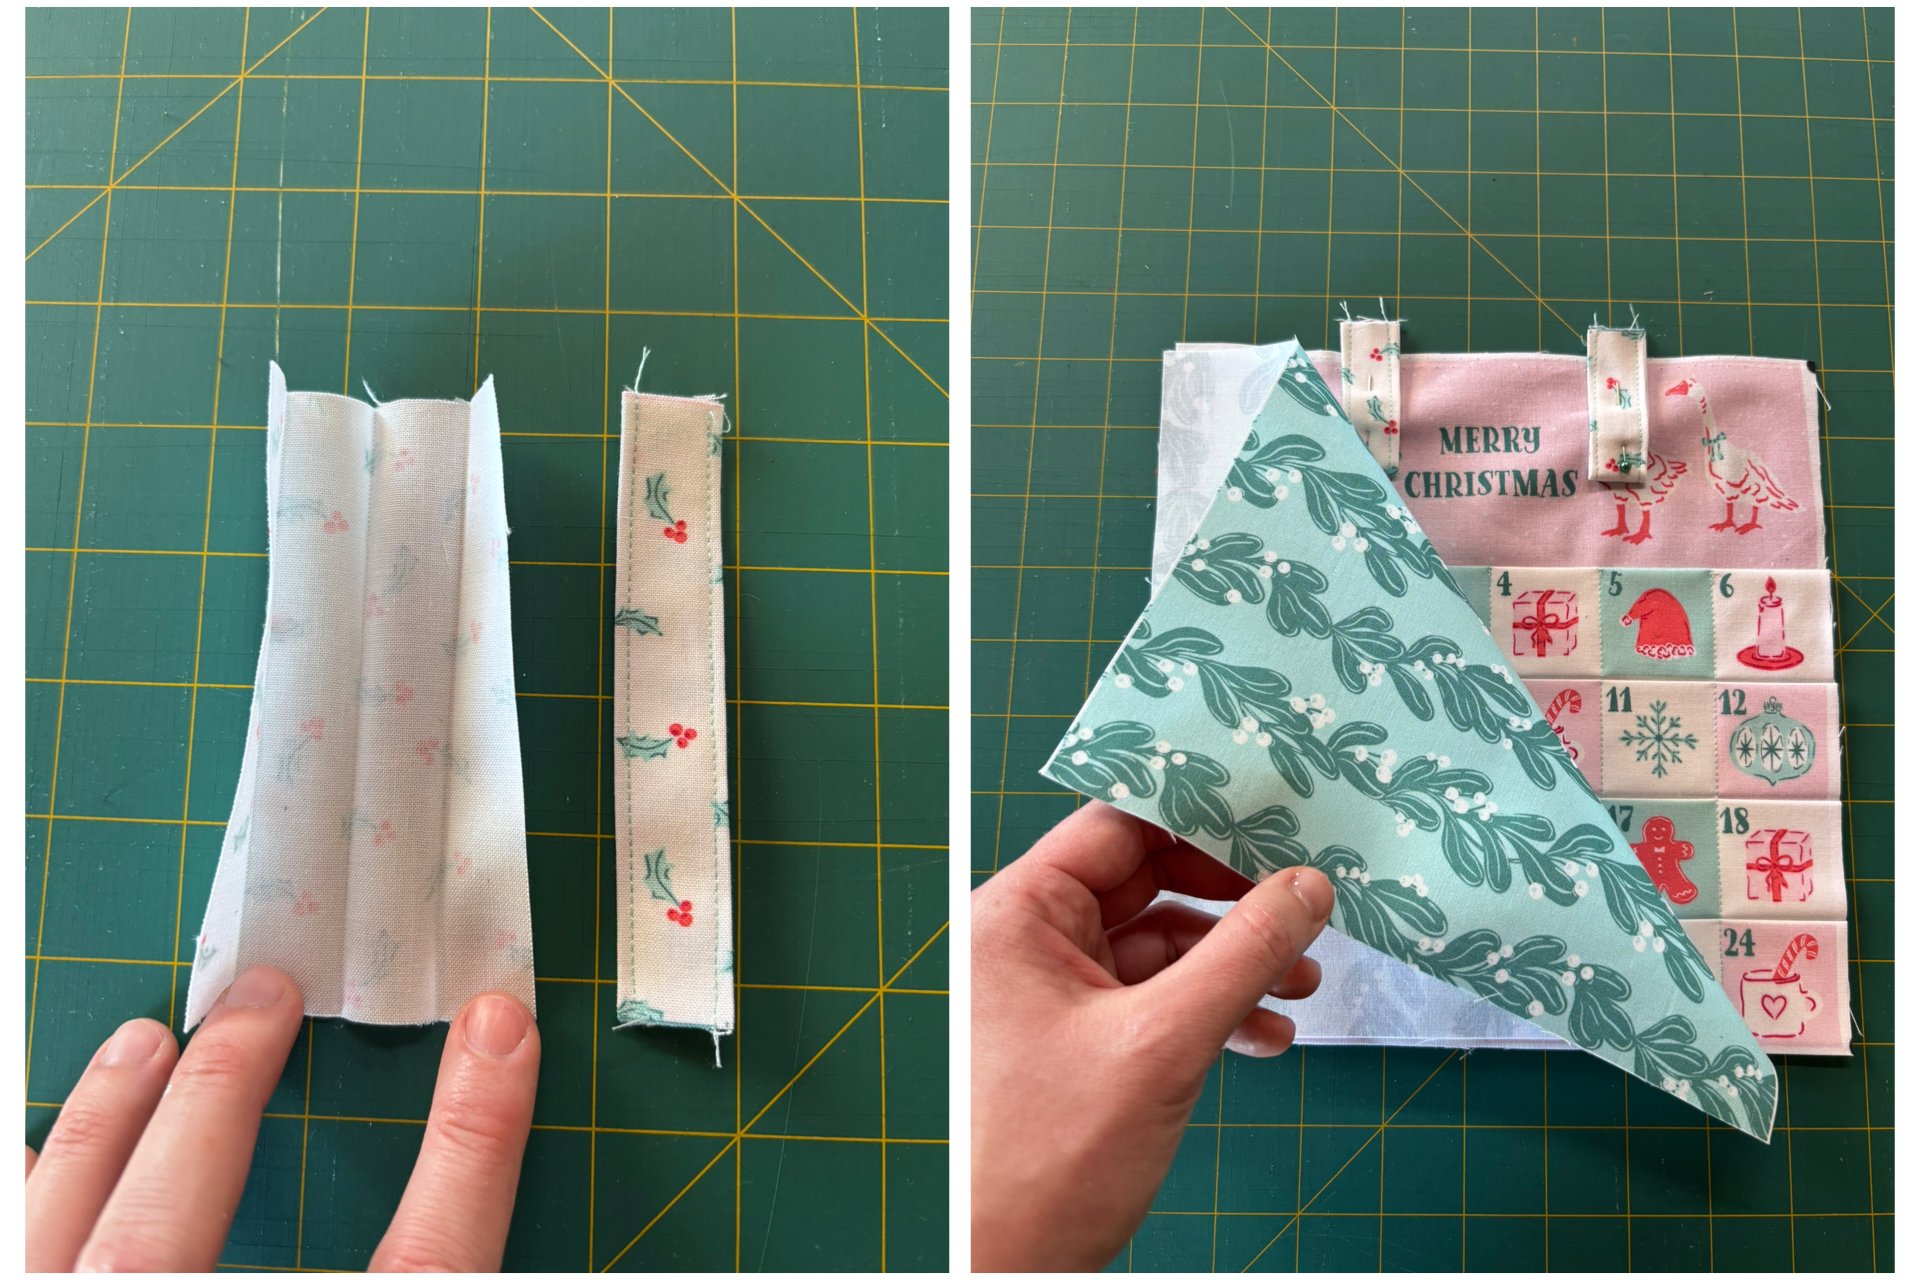
Making and attaching the hanging straps
Step 7 - Add the backing
Place the backing fabric over the advent calendar panel with right sides together. The hanging straps should now be sandwiched between the calendar and backing layers. Align all raw edges and pin or clip around the outside edge.
Step 8 - Sew the calendar together
Sew around the entire outside edge of the calendar using a 1/4-inch seam allowance, leaving a small opening along the edge for turning. Remove pins or clips as you sew. Trim the seam allowance at the corners to reduce bulk, taking care not to cut through your stitching. Trim any excess strap fabric extending beyond the seam if necessary.
Step 9 - Turn and press
Carefully turn the advent calendar right side out through the opening. Gently push out each corner using a blunt tool. Fold the raw edges of the opening inward so they align with the edge, then press the entire calendar flat with a hot iron.
Step 10 - Topstitch and finish
Topstitch around the entire outside edge of the advent calendar, stitching close to the edge. This will close the turning opening, reinforce the hanging straps and give the calendar a neat edge. Give your finished advent calendar a final press. To hang your calendar, slide a small wooden dowel or takeaway chopsticks through the two hanging loops and add a length of ribbon or twine. Now you are ready to fill the 24 pockets with little treats and surprises!